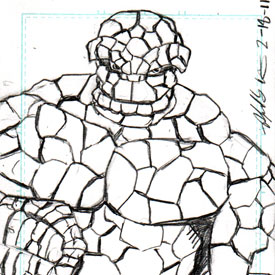
Thing
Avengers Sketch Card – Day 27
.05 HB Mechanical Pencil, 20 Minutes.
This blog post was originally published on my other website Comic Book Graphic Design and has now been migrated here to RSC Arts, Ralph’s Art Blog.
Ralph's Art Blog
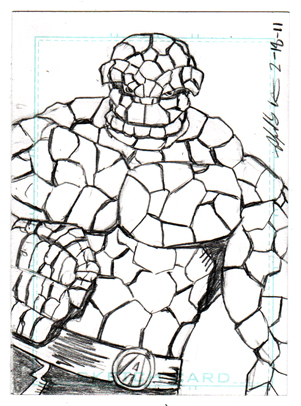
Thing
Avengers Sketch Card – Day 27
.05 HB Mechanical Pencil, 20 Minutes.
This blog post was originally published on my other website Comic Book Graphic Design and has now been migrated here to RSC Arts, Ralph’s Art Blog.
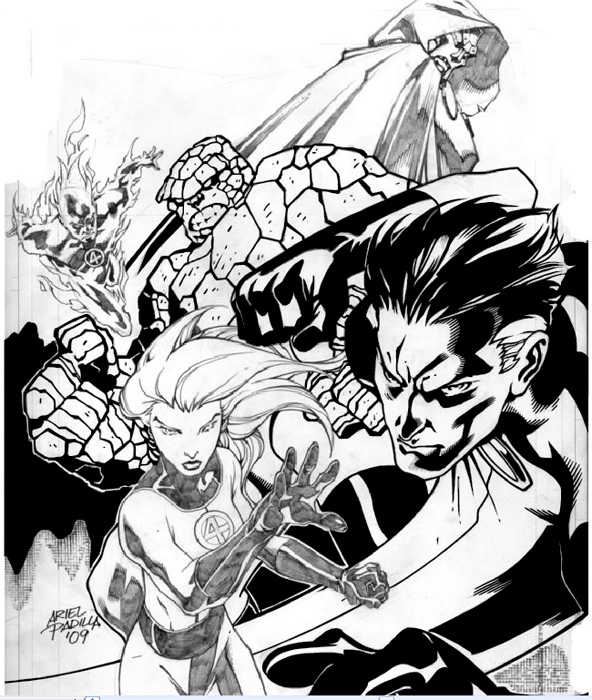
I’ve received several requests to show the steps I used to create my digital inking of the Fantastic Four pin-up I did of artist Ariel Padilla’s pencils. I was looking for some art to ink and found the pencils on his DeviantArt page. This was a practice exercise I gave myself in the inking process of comic book art using Adobe Illustrator. I’ve been a graphic designer for over 9 years but this was the first time I used my design knowledge for comic book inking.
For this self-assignment, I decided to use Adobe Illustrator for inking the pin-up. I had used photoshop for a previous piece earlier I did of Batman 2.0, a character redesign. I had fun with that illustration but this time I wanted to do this digital inking in vector format. Why choose vector verse bitmap? Well, a vector image is made up of anchor points that are connected by paths (lines) that connect them. A vector image can be re-sized without loss of quality to the illustration. So basically you can re-size the image as small or as large as you’d like without pixelation, it will keep its sharpness no matter the size. Which is really neat.
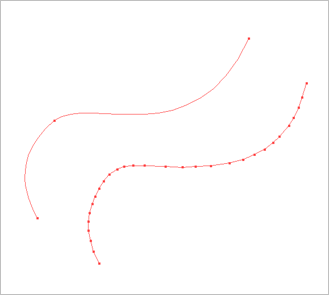
For this illustration, I choose to use my anchor points to create only straight paths (lines). I didn’t use any curved lines. The cool thing about using anchor points and paths is that you can make curved paths, resulting in fewer points This is shown in Points & Paths: Example 2. So why didn’t I use curve paths? Well, honestly it was a self-exercise to see if I could do it. I wanted to create curved lines through straight lines. I found it to be a fun challenge.
I did not create lines or outlines of the original pencils. What I did was look at each line as a shape. I could have easily used the brush tool in Illustrator, but I found I actually had more control over what I wanted to achieve by using the pen tool.
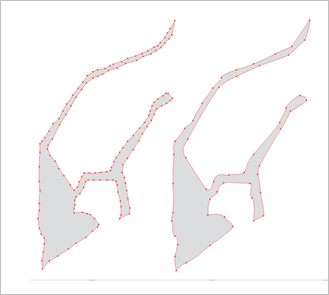
With the technique, I like to use anchor points and paths I am able to get a type of jagged smooth shape. The strength of anchor points is you can use as many or as few points as you’d like to create your lines or shapes. I’ve illustrated this in Points & Paths: Example 3.

After I created the shape from the pencils, I colored it in black. I’ve shown this in Points & Paths: Example 4. As you can see it’s a piece of a puzzle that makes up the inking. These shapes help to create the feel I was looking for when digitally inking this drawing. This technique really works well when inking the Thing’s rocky skin.
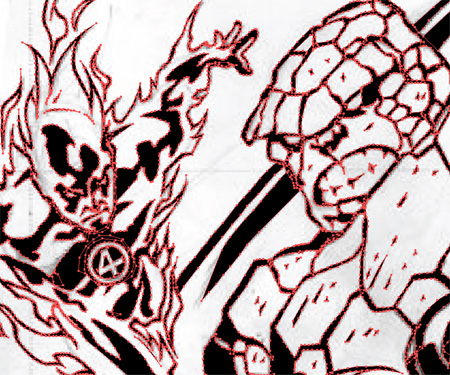
I have included more examples of the anchor points and paths technique I use in inking these pencils. In Points & Paths: Example 5, we see how the wavy fire on Human Torch can be created without using curved lines. Every anchor point in the flames helps to create the illusion of line weight, depth, and movement.
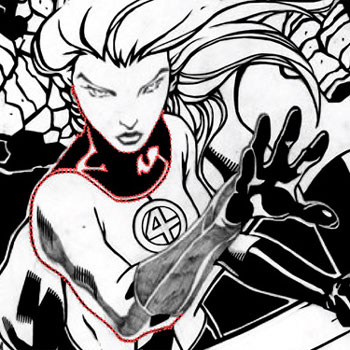
In Points & Paths: Example 6, I’ve shown how I created what looks to be a line on the Invisible Woman’s arm. It is actually a curved shape created with paths. It is a shape that includes the bottom line of her arm and the shadows around her neck. You can see her hands and the background is already colored in.
Although this technique might not seem to be the most efficient, it allows for a lot of control. Looking at each line as a shape helped me to create a type of line work I would not have achieved otherwise.

This was my first comic book digital inking using Adobe Illustrator with the anchor points and paths technique. I have done a few more since this one. Although I have used curved lines in those illustrations. This was a fun self-exercise in learning to digitally ink the work of someone else. I am very happy with the way this illustration came out, and I’ll continue to use Adobe Illustrator to digitally ink comic book pencils.
This blog post was originally published on my other website Comic Book Graphic Design and has now been migrated here to RSC Arts, Ralph’s Art Blog.
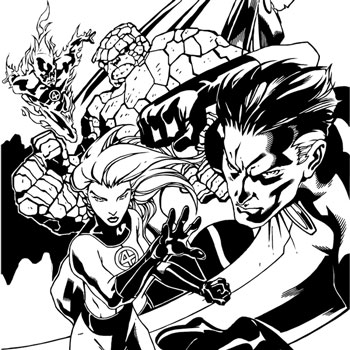
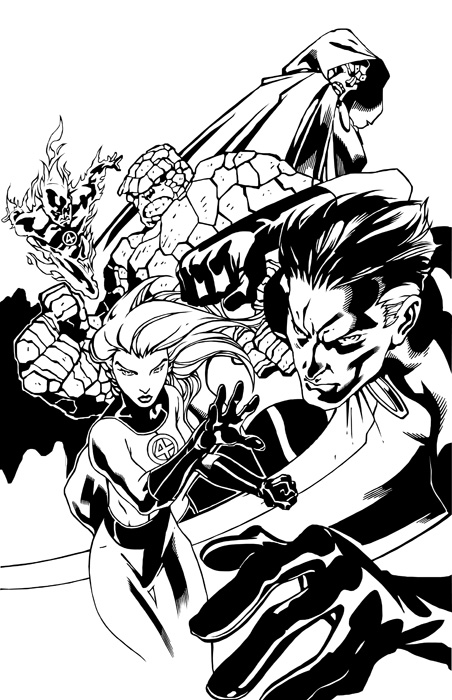
Here is a digitally inked Pinup of an awesome penciled piece of the Fantastic Four by artist Ariel Padilla. I found the pencils on his DeviantArt page and I knew I had to ink it. I used Adobe Illustrator so I could create a vector image. This way it can be reduced or enlarged with no pixelation of the image. This is actually my second piece digitally inked but the first I’ve done in Illustrator. My Batman 2.0 character redesign was my first digitally inked piece but for that I used Photoshop. I have used Illustrator in the past to create illustrations, logos, advertisements, and marketing but this was the first time I incorporated my graphic design skills into inking.
I have a Wacom tablet but for this digital inking, I used only my mouse and the pen tool. So basically the piece is all straight vector anchor points. This illustration took about 5 hours, which is longer than I thought it would, but it was fun and a nice practice piece. On my next Illustrator ink, I plan on using the Wacom tablet and the brush tool. Right now it is all about having fun and learning to use the tools I use in my graphic design work in my comic book artwork. My next step will be to create flats for these inks and maybe color them too.

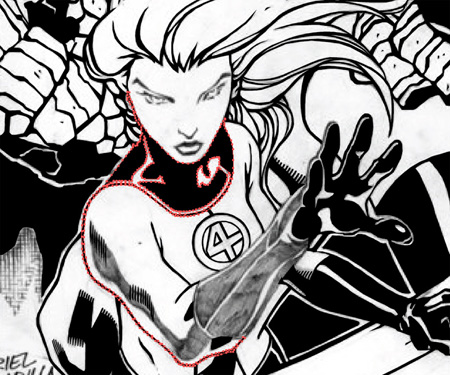
Here are the original pencils by Ariel Padilla.
Want to see the steps I took to create the digital inking? Check out my blog post: Comic Book Digital Inking Techniques with Illustrator Vector Anchor Points
This blog post was originally published on my other website Comic Book Graphic Design and has now been migrated here to RSC Arts, Ralph’s Art Blog.